Documentation Index
Fetch the complete documentation index at: https://docs.faces.app/llms.txt
Use this file to discover all available pages before exploring further.
Claude.ai
- Open claude.ai/customize/connectors?modal=add-custom-connector. The Add custom connector dialog will appear:
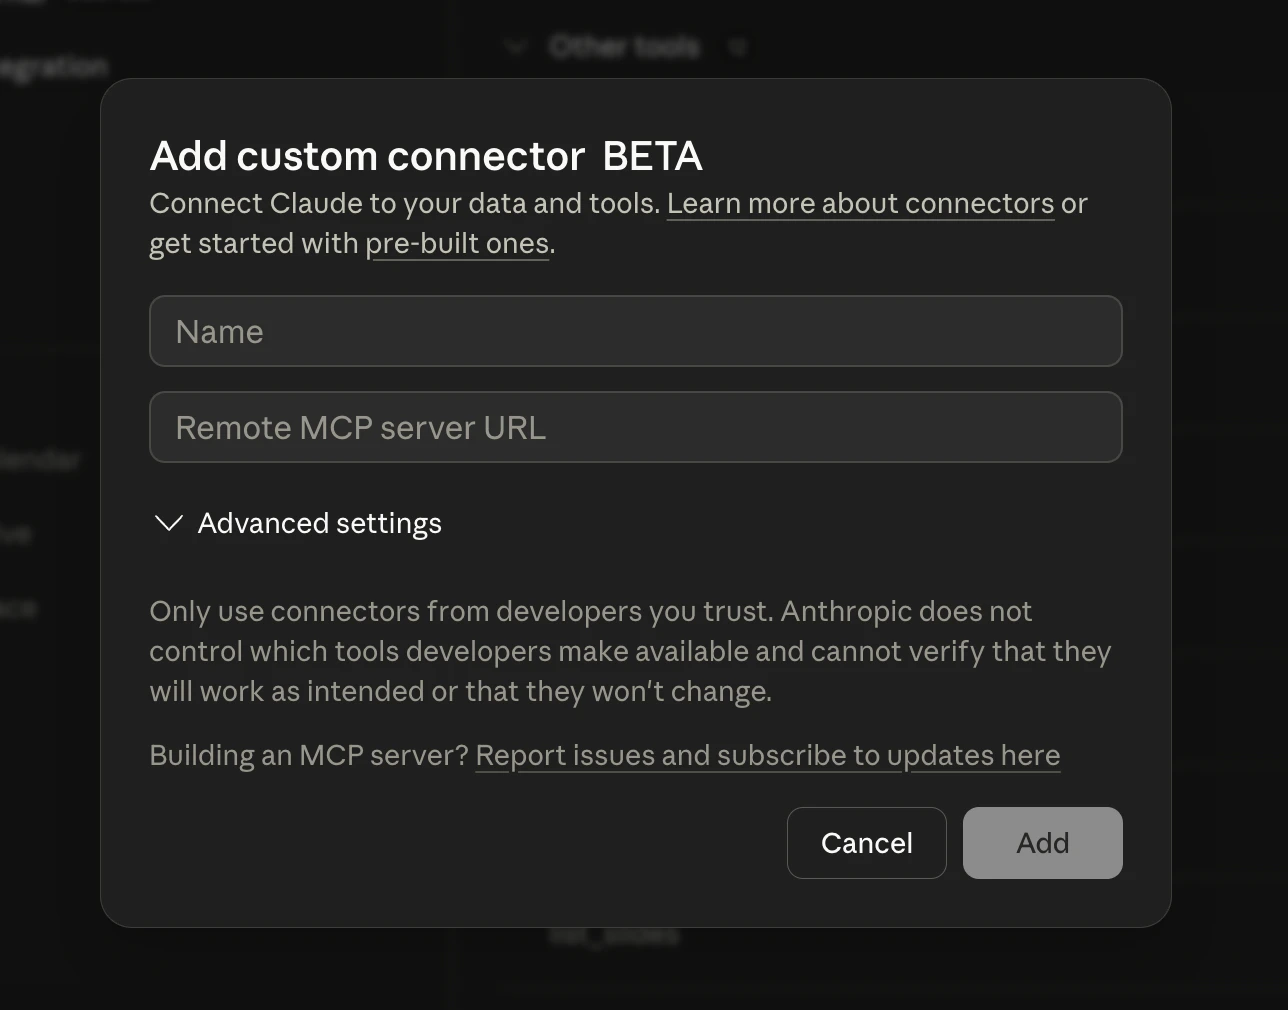
- Fill in the fields:
- Name:
Faces - Remote MCP server URL:
https://mcp.faces.app/mcp
- Name:
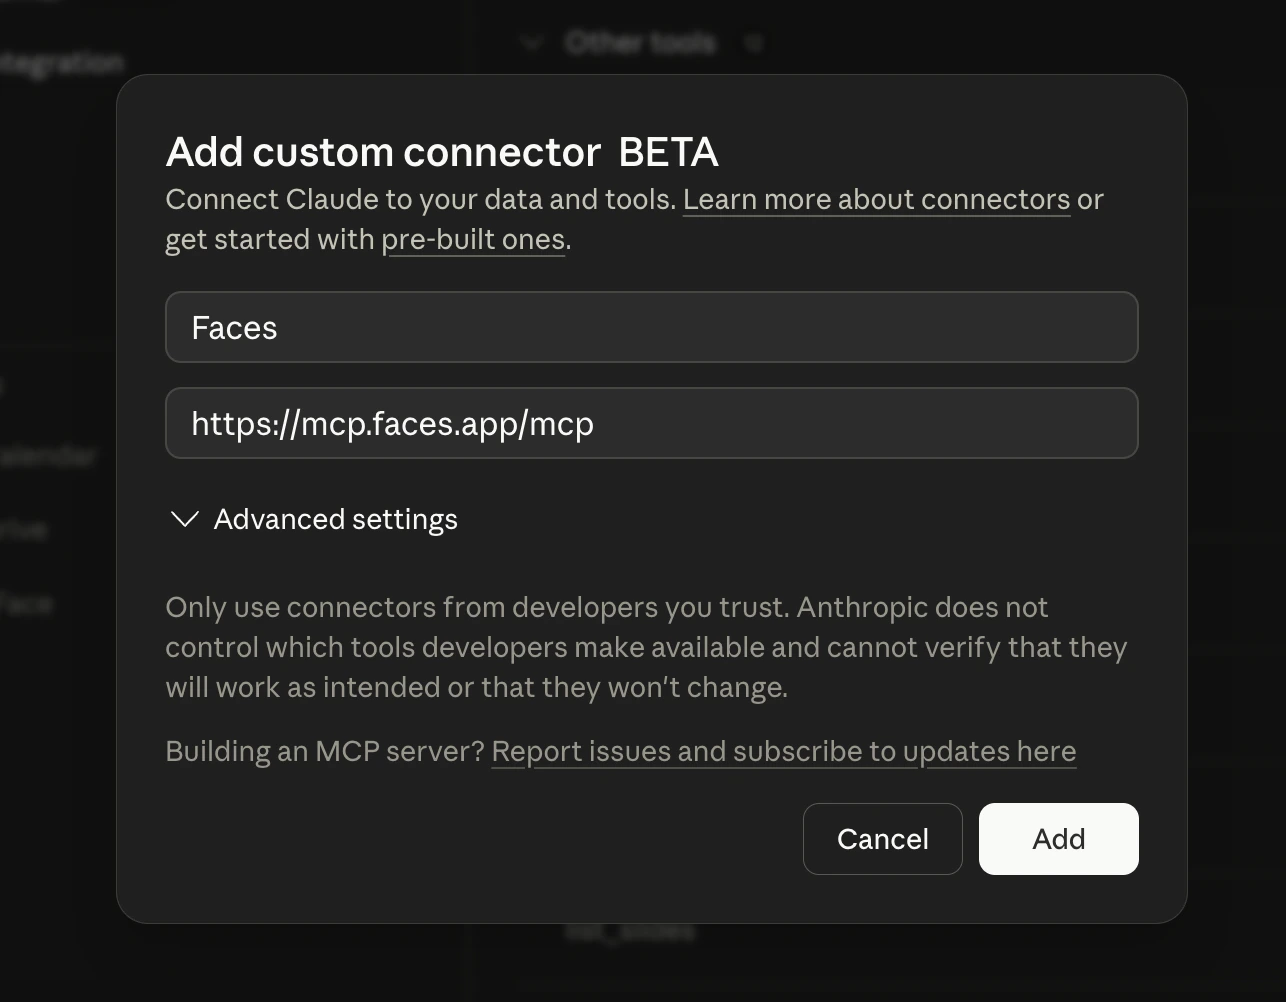
- Click Add, then authenticate with your Faces account through the browser. That’s it, you’re ready to go.
The MCP server uses OAuth with a dynamic OAuth client, so the same URL works
in any MCP-compatible client, including Claude (Chat, Cowork, Code), ChatGPT,
Codex, and more. No API key needed.
Claude Code
Add the Faces MCP server to Claude Code:Other MCP clients
Any MCP-compatible client can connect to the Faces server. Use:- HTTP endpoint:
https://mcp.faces.app/mcp - Auth: OAuth 2.0 with dynamic client registration (authorization server metadata at
https://mcp.faces.app/.well-known/oauth-authorization-server)
Verify the connection
After connecting, ask Claude:List my Faces projectsClaude should use the
list_projects tool and show your projects. If you see an authentication error, try disconnecting and reconnecting to re-trigger the OAuth flow.